
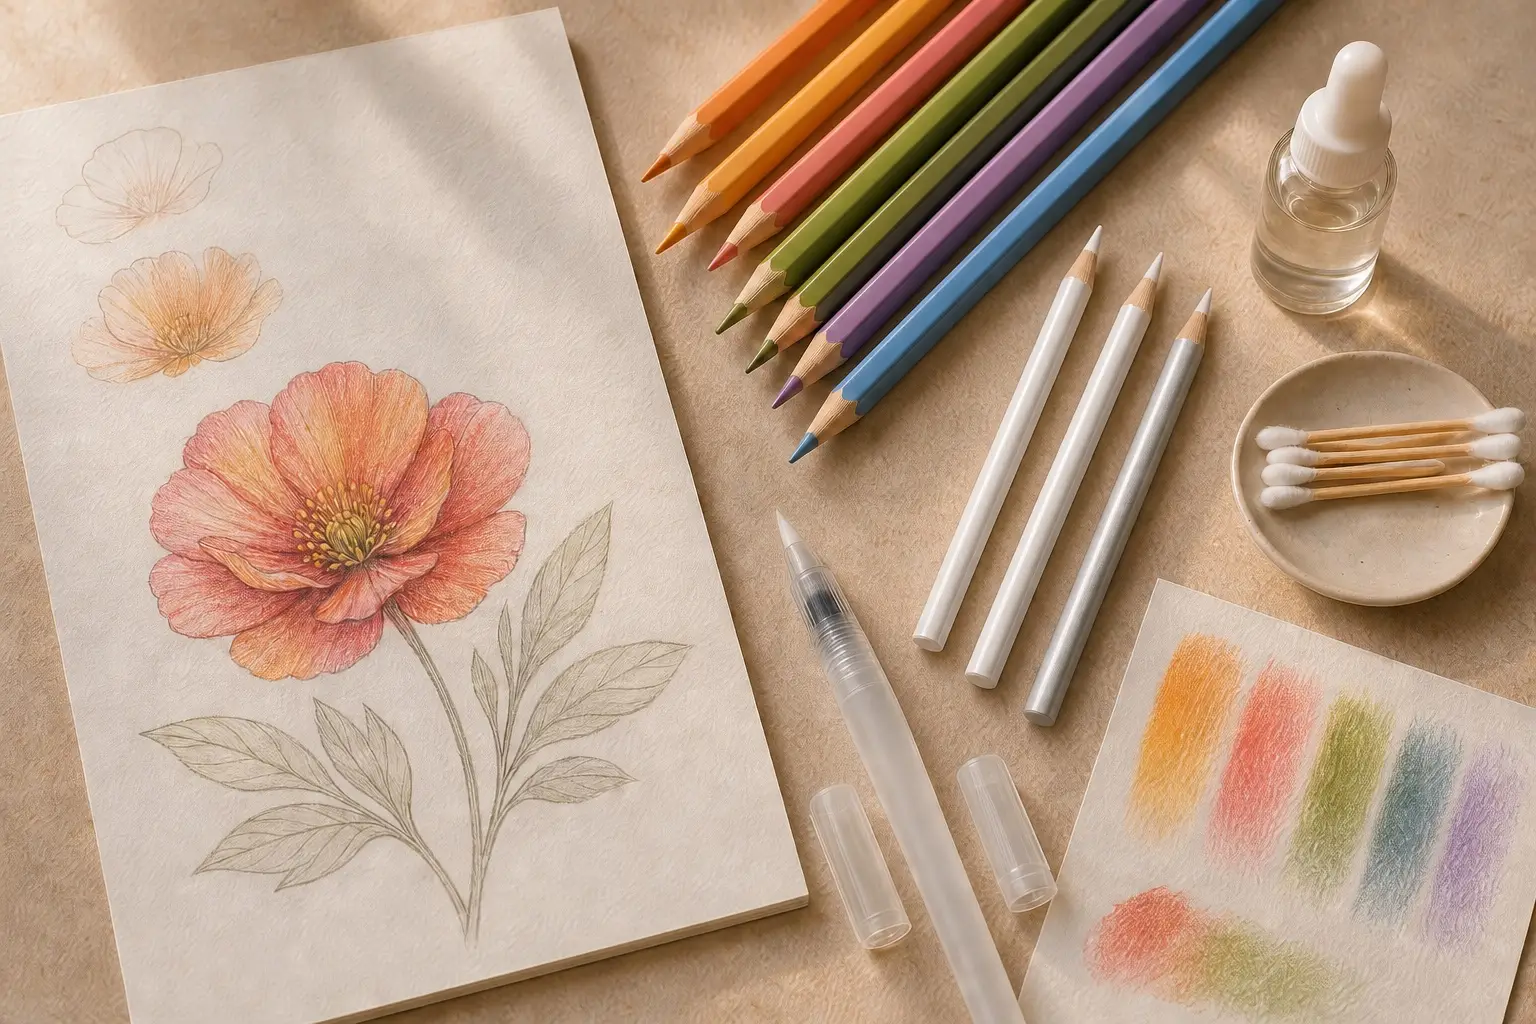
Choose by use case
If you wantMost colorists who want one precise dry blender for gradients, edges and light final polishing

Prismacolor Premier Colorless Blender Pencils, 2 Count
Best overallResearch-based reviewA two-pack of pigment-free wax-core pencils that blends without adding a new color
If you wantBeginners who want to compare softer blending with harder final burnishing in one pack

KALOUR Colorless Blender and Burnisher Pencil Set, 6 Count
Best blender-and-burnisher starter setResearch-based reviewFive colorless blender pencils and one separate burnisher cover two different finishing jobs
If you wantArtists who want a precise pencil plus a broad solid stick for larger areas and mixed surfaces

Caran d'Ache Pencil Blender and Full Blender Bright Set
Best premium dry setResearch-based reviewA wood-cased Pencil Blender and solid Full Blender Bright combine detail control with broad coverage
If you wantColorists seeking soft wash-like transitions with a dedicated water-based colored-pencil medium

Holbein Meltz Colored Pencil Blender, 35 ml
Best water-based liquidResearch-based reviewA 35 ml water-based liquid blender designed to dissolve and gradate colored-pencil layers
If you wantDetail colorists who want fine and bold solvent applicators in one capped tool

Speedball Finesse Colored Pencil Blender Pen
Best solvent penResearch-based reviewA dual-tip colorless solvent pen for unifying and softening colored-pencil layers
If you wantOccasional colorists who want one documented wax-based blender without buying a set

STAEDTLER 5426 BL Colorless Blender Pencil
Best single pencilResearch-based reviewA single non-pigmented wax pencil for blending and softening colored-pencil edges
If you wantFinished drawings that need stronger color fusion, reduced pencil strokes and a more polished surface

LYRA Rembrandt Splender Colorless Blending Pencils, 2 Pack
Best polishing pencilResearch-based reviewA colorless polishing pencil intended to blend wax- and oil-based colored pencils and increase shine
If you wantFrequent colorists who want dedicated blender tips for warm, cool, pale and dark palettes

Cezanne Colorless Blender Pencils, Box of 6
Best multipackResearch-based reviewSix soft 3.3 mm wax-based blender pencils for repeated use and palette separation
Product comparison
| Product | Best for | Watch out | Price & shop |
|---|---|---|---|
| Prismacolor Premier Colorless Blender Pencils, 2 Count (opens Amazon in a new tab) Best overallResearch-based review | Most colorists who want one precise dry blender for gradients, edges and light final polishing | It still adds binder and pressure, so an aggressive pass can flatten the paper tooth before the drawing is ready | Budget-friendlyCheck price on Amazon (opens Amazon in a new tab) |
| KALOUR Colorless Blender and Burnisher Pencil Set, 6 Count (opens Amazon in a new tab) Best blender-and-burnisher starter setResearch-based review | Beginners who want to compare softer blending with harder final burnishing in one pack | The brand publishes fewer core specifications than Prismacolor, STAEDTLER or Caran d'Ache, and only one burnisher is included | Budget-friendlyCheck price on Amazon (opens Amazon in a new tab) |
| Caran d'Ache Pencil Blender and Full Blender Bright Set (opens Amazon in a new tab) Best premium dry setResearch-based review | Artists who want a precise pencil plus a broad solid stick for larger areas and mixed surfaces | The glossy water-resistant finish is best treated as a late-stage effect because it may resist additional pencil layers | |
| Holbein Meltz Colored Pencil Blender, 35 ml (opens Amazon in a new tab) Best water-based liquidResearch-based review | Colorists seeking soft wash-like transitions with a dedicated water-based colored-pencil medium | Liquid can cockle thin paper, move printed line art or spread beyond an edge if too much is used | |
| Speedball Finesse Colored Pencil Blender Pen (opens Amazon in a new tab) Best solvent penResearch-based review | Detail colorists who want fine and bold solvent applicators in one capped tool | The solvent-based formula requires ventilation, current-label and SDS review, cap care and paper testing | Budget-friendlyCheck price on Amazon (opens Amazon in a new tab) |
| STAEDTLER 5426 BL Colorless Blender Pencil (opens Amazon in a new tab) Best single pencilResearch-based review | Occasional colorists who want one documented wax-based blender without buying a set | A one-pencil pack offers no spare and no separate hardness for final burnishing | Budget-friendlyCheck price on Amazon (opens Amazon in a new tab) |
| LYRA Rembrandt Splender Colorless Blending Pencils, 2 Pack (opens Amazon in a new tab) Best polishing pencilResearch-based review | Finished drawings that need stronger color fusion, reduced pencil strokes and a more polished surface | Strong polishing can make a surface shinier and less receptive to later color or correction | Budget-friendlyCheck price on Amazon (opens Amazon in a new tab) |
| Cezanne Colorless Blender Pencils, Box of 6 (opens Amazon in a new tab) Best multipackResearch-based review | Frequent colorists who want dedicated blender tips for warm, cool, pale and dark palettes | The box contains only one soft blender style, so it does not replace a harder burnisher or broad-area medium | Budget-friendlyCheck price on Amazon (opens Amazon in a new tab) |
How we researched this guide
- Product listings checked
- Hands-on testing
- None of the 8 picks — all are research-based
- Labels explained
- How we test and label products
This is a research-based buying guide, not a controlled blending test. On September 2, 2026, we opened every exact Amazon.com detail page, confirmed a current new offer or in-stock buy box, checked the ASIN and matched the exact variant to its high-resolution Amazon CDN image. We cross-checked formula, format, pack count and intended use with current manufacturer pages or catalogs from Prismacolor, Caran d'Ache, Holbein, Speedball, STAEDTLER and LYRA, plus the official KALOUR storefront and the owner of the Cezanne brand. We favored tools with a clear role: gentle dry blending, final burnishing, broad coverage, dual-tip solvent application, water-based liquid blending or economical palette separation. We did not measure pressure, blend smoothness, color shift, gloss, paper damage, tip life, odor, dry time or compatibility across every pencil and paper. Availability can change, so recheck the linked detail page before buying.
Testing status by pick
- Prismacolor Premier Colorless Blender Pencils, 2 CountResearch-based review
- KALOUR Colorless Blender and Burnisher Pencil Set, 6 CountResearch-based review
- Caran d'Ache Pencil Blender and Full Blender Bright SetResearch-based review
- Holbein Meltz Colored Pencil Blender, 35 mlResearch-based review
- Speedball Finesse Colored Pencil Blender PenResearch-based review
- STAEDTLER 5426 BL Colorless Blender PencilResearch-based review
- LYRA Rembrandt Splender Colorless Blending Pencils, 2 PackResearch-based review
- Cezanne Colorless Blender Pencils, Box of 6Research-based review
Product details and drawbacks
Prismacolor Premier Colorless Blender Pencils, 2 Count (opens Amazon in a new tab)
A two-pack of pigment-free wax-core pencils that blends without adding a new color

Why it fits this guide
Prismacolor offers the clearest entry point into colorless blending. The familiar wood-cased pencil reaches small printed spaces, and the current manufacturer page identifies a pigment-free wax core for softening edges, layering and bright blends. Two pencils also let you keep one tip for pale colors and another for saturated shadows.
Honest drawback
It still adds binder and pressure, so an aggressive pass can flatten the paper tooth before the drawing is ready
Specifications
- Exact two-count Amazon.com ASIN had a current new offer on September 2, 2026
- Pigment-free wax-based core
- Two unsharpened blender pencils in model 962
Best forMost colorists who want one precise dry blender for gradients, edges and light final polishing
Pros
- Precise wood-cased format suits small coloring-book areas
- Does not add another pigment hue
- Two pencils make basic palette separation possible
Cons
- Tip needs cleaning between dark and pale colors
- Heavy use can fill the remaining paper tooth
KALOUR Colorless Blender and Burnisher Pencil Set, 6 Count (opens Amazon in a new tab)
Five colorless blender pencils and one separate burnisher cover two different finishing jobs

Why it fits this guide
KALOUR makes the blender-versus-burnisher distinction visible and affordable. The five softer pencils can be assigned to warm, cool, light and dark palettes, while the single gray burnisher is reserved for the stronger polishing pass. That separation is more useful for learning than six identical pencils.
Honest drawback
The brand publishes fewer core specifications than Prismacolor, STAEDTLER or Caran d'Ache, and only one burnisher is included
Specifications
- Exact six-pencil Amazon.com ASIN was in stock on September 2, 2026
- Five blender pencils and one harder burnisher pencil
- Current listing identifies non-pigmented wax-based cores
Best forBeginners who want to compare softer blending with harder final burnishing in one pack
Pros
- Both blender and burnisher formats are included
- Multiple blender tips reduce cross-color contamination
- Budget-friendly way to compare finishing pressure
Cons
- Only one burnisher in the set
- Limited manufacturer technical detail
Caran d'Ache Pencil Blender and Full Blender Bright Set (opens Amazon in a new tab)
A wood-cased Pencil Blender and solid Full Blender Bright combine detail control with broad coverage

Why it fits this guide
Caran d'Ache pairs two genuinely different shapes around the same colorless wax-oil concept. The 3.8 mm pencil can be sharpened around line art, while the hexagonal Full Blender Bright can be held flatter across backgrounds. The brand documents mixing, blending and intensifying colored pencil, graphite and wax pastel on several surfaces.
Honest drawback
The glossy water-resistant finish is best treated as a late-stage effect because it may resist additional pencil layers
Specifications
- Exact 902.301 Amazon.com ASIN was in stock on September 2, 2026
- One 3.8 mm wax-oil Pencil Blender and one hexagonal Full Blender Bright
- Swiss-made set documented for color pencil, graphite and wax pastel
Best forArtists who want a precise pencil plus a broad solid stick for larger areas and mixed surfaces
Pros
- Two shapes handle both detailed and broad application
- Official documentation clearly explains the finish
- Solid stick is economical across larger areas
Cons
- More expensive than a basic blender pencil
- Broad stick needs care near printed outlines
Holbein Meltz Colored Pencil Blender, 35 ml (opens Amazon in a new tab)
A 35 ml water-based liquid blender designed to dissolve and gradate colored-pencil layers

Why it fits this guide
Holbein Meltz is the distinct liquid choice in this guide because the manufacturer identifies it as water-based and shows it alongside its Artists' Colored Pencils. A tiny amount applied with a clean brush or swab can reach broad transitions without the pressure of a hard burnisher. Its behavior remains paper-dependent, so testing is essential.
Honest drawback
Liquid can cockle thin paper, move printed line art or spread beyond an edge if too much is used
Specifications
- Exact OP850 Amazon.com ASIN was in stock on September 2, 2026
- 35 ml narrow-nozzle bottle
- Manufacturer identifies Meltz as a water-based blender
Best forColorists seeking soft wash-like transitions with a dedicated water-based colored-pencil medium
Pros
- Provides a pressure-free alternative to dry burnishing
- Officially designed around colored-pencil gradation
- Narrow nozzle supports controlled dispensing
Cons
- Requires paper and line-art compatibility testing
- Bottle-and-applicator workflow is less portable than a pencil
Speedball Finesse Colored Pencil Blender Pen (opens Amazon in a new tab)
A dual-tip colorless solvent pen for unifying and softening colored-pencil layers

Why it fits this guide
Finesse keeps solvent application self-contained. Speedball documents a colorless, fast-drying blender for colored pencils, while the current Amazon version provides fine and bold tips. The fine end is useful around narrow spaces and the broad end covers larger transitions without a separate brush.
Honest drawback
The solvent-based formula requires ventilation, current-label and SDS review, cap care and paper testing
Specifications
- Exact one-pen Amazon.com ASIN had a current in-stock offer on September 2, 2026
- Fine and bold applicator tips
- Speedball describes the formula as solvent-based, acid-free, low odor and fast drying
Best forDetail colorists who want fine and bold solvent applicators in one capped tool
Pros
- Self-contained application is tidier than an open bottle
- Two tip sizes handle details and broader gradients
- Manufacturer documents use across colored-pencil types
Cons
- Needs more cautious handling than a dry pencil
- Tips can become stained by dark pigment
STAEDTLER 5426 BL Colorless Blender Pencil (opens Amazon in a new tab)
A single non-pigmented wax pencil for blending and softening colored-pencil edges

Why it fits this guide
STAEDTLER 5426 is the uncluttered option. The official product page states exactly what matters: the pencil is non-pigmented, wax-based and intended to blend and soften colored-pencil artwork. It is a sensible trial tool when six pencils, a hard burnisher or a liquid medium would be unnecessary.
Honest drawback
A one-pencil pack offers no spare and no separate hardness for final burnishing
Specifications
- Exact 5426BLBK-C Amazon.com ASIN had a current offer on September 2, 2026
- One non-pigmented wax-based blender pencil
- Wood from FSC-certified sustainably managed forests
Best forOccasional colorists who want one documented wax-based blender without buying a set
Pros
- Simple low-commitment way to try colorless blending
- Intended use is clearly documented by the manufacturer
- Sharpenable point suits small printed details
Cons
- No second pencil for palette separation
- No harder burnisher in the package
LYRA Rembrandt Splender Colorless Blending Pencils, 2 Pack (opens Amazon in a new tab)
A colorless polishing pencil intended to blend wax- and oil-based colored pencils and increase shine

Why it fits this guide
The Rembrandt Splender earns a separate role from an everyday soft blender. LYRA documentation calls it a polishing pencil that blends colors, reduces visible lines and creates shine on oil- and wax-based pencils. Use it when the drawing is nearly complete and that more compressed finish is intentional.
Honest drawback
Strong polishing can make a surface shinier and less receptive to later color or correction
Specifications
- Exact two-pencil Amazon.com ASIN had a current low-stock offer on September 2, 2026
- Colorless polishing pencil model L2000200
- Manufacturer documentation covers oil- and wax-based colored pencils
Best forFinished drawings that need stronger color fusion, reduced pencil strokes and a more polished surface
Pros
- Clear specialist role for later-stage polishing
- Can reduce visible strokes and unify saturated layers
- Two-pencil pack provides a spare
Cons
- Can create more shine than a colorist wants
- Less forgiving when used before the colors are finished
Cezanne Colorless Blender Pencils, Box of 6 (opens Amazon in a new tab)
Six soft 3.3 mm wax-based blender pencils for repeated use and palette separation

Why it fits this guide
Cezanne is the practical bulk choice. Six wood-cased pencils let a frequent colorist keep contaminated dark tips away from pale skin tones or yellow highlights. The brand owner documents a soft 3.3 mm wax-based core and an easy-sharpening wood case, while the current Amazon listing matches the same six-pencil format.
Honest drawback
The box contains only one soft blender style, so it does not replace a harder burnisher or broad-area medium
Specifications
- Exact six-pencil Amazon.com ASIN was in stock on September 2, 2026
- Six soft colorless blender pencils
- 3.3 mm wax-based cores in wood cases
Best forFrequent colorists who want dedicated blender tips for warm, cool, pale and dark palettes
Pros
- Enough pencils to separate several color families
- Sharpenable points fit detailed coloring work
- Useful quantity for frequent sessions or a shared table
Cons
- Too many pencils for occasional use
- No dedicated harder burnisher
Corrections
Spotted an error or outdated detail? Read how we handle corrections.
Related guides
Best Colored Pencil Sharpeners
Find the right pencil sharpener for colored pencils: 10 manual, crank and electric picks compared by point shape, core support and barrel fit.
Best Colored Pencils for Adult Coloring Books
Compare 10 colored-pencil sets for adult coloring books by core feel, color range, detail control, layering, paper fit, storage and replacement options.
Best Skin-Tone Colored Pencils for Portrait Coloring
Compare eight skin-tone colored-pencil sets for portrait coloring by shade range, core feel, blending, detail control, storage and documented light resistance.
Best Watercolor Pencils for Coloring Books
Compare 10 beginner-friendly watercolor-pencil sets for coloring books by dry control, water activation, palette size, paper fit, core feel and storage.


